Pyjama - Quick Start
Here you will find
background information for the Pyjama's motivation, as well
as some examples to illustrate the numerous features it provides.
- 1. Motivation
- 1.1 Why parallel computing?
- 1.2 Object-oriented programming and (sequential) Iterators
- 1.3 The Pyjama
- 2. Preparation
- 2.1 What you need
- 2.2 Pyjama installation and usage
- 2.3 Pyjama Eclipse Plugin installation and usage
- 3. Pyjama examples
1. Motivation
1.1 Why Parallel computing?
Parallel
computing has arrived to mainstream desktop systems in the form of
multi-core processors because of the difficulties in maintaining
improvements in uni-processor clock-speed. Unfortunately, users will
not witness any performance improvements unless their applications are
parallelized. Parallel computing is however notoriously difficult,
especially in terms of program correctness and high performance.
1.2 Object-oriented programming and (sequential) Iterators
An important aspect of the Parallel Iterator is that it focusses on
object-oriented (OO) programming, since the most popular
languages are OO [TIOBE], especially for general purpose desktop
applications. Iterative computations usually carry the lion's share of
computational load, and in OO languages this is often implemented with
iterators. For example, consider
the following Java application code that traverses a collection of
files and processes each one:
	Collection<File> elements = ...
	Iterator<File> it = elements.iterator();
	while ( it.hasNext() ) {
		File file = it.next();
		processFile(file);
	}
Unfortunately,
this code only contains one thread - therefore only one processor core
will be employed to execute the loop while the other cores remain idle!
So, what are software developers left to do? Unfortunately, they must
first create multiple threads, and then explicitly distribute the
elements amongst the threads. The following problems arise:
- how are the elements distributed amongst the threads?
(i.e. the scheduling policy)
- how to implement such a scheme?
- what about the correctness of the manually-implemented
distribution scheme?
- what about the performance of this scheme?
In most case, the programmer must
manually
implement such a scheduling policy. Unfortunately, the simplest schemes
to implement tend to be the least efficient, while the most efficient
schemes tend to be too complicated and error prone.
1.3 The Pyjama
2. Preparation
2.1 What you need
Pyjama is a pure java project, which support both desktop and android environment.
Before you start, make sure you have Java Development Toolkit installed, the suggested version is JDK 1.6.
The latest release of Pyjama can be downloaded from
here. We also provide the source code download from our SVN server.
2.2 Pyjama installation and usage
If you download the source code, you need to compile it and create the pyjama.jar before you use.
The structure of the source code should look like

The build.xml is an Ant script, which is recommended to be used to compile and build Jar file.
In order to use this script, first, you need to have the Apache Ant installed. Then you MUST download all the required libraries, which including PTCompiler.jar, PTRuntim.jar and ParaIterator.jar. All these libraries can be found through our website and SVN server. Finally, crreate a new folder called lib, and put all three Jar Files into it.
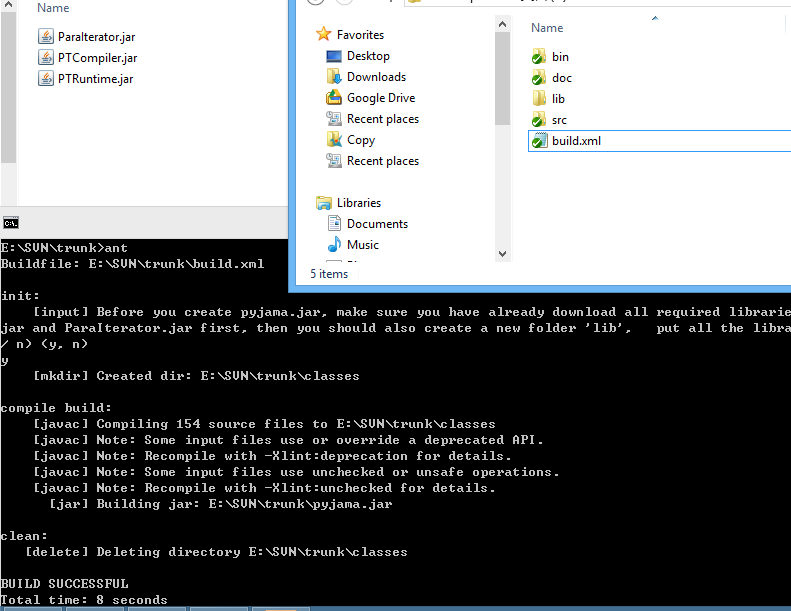
If you build the pyjama.jar file, you may also need all dependent libraries when using the pyjama.jar. However, if you download the pyjama.jar from the website, you do not need other libraries since all of them are packed together.
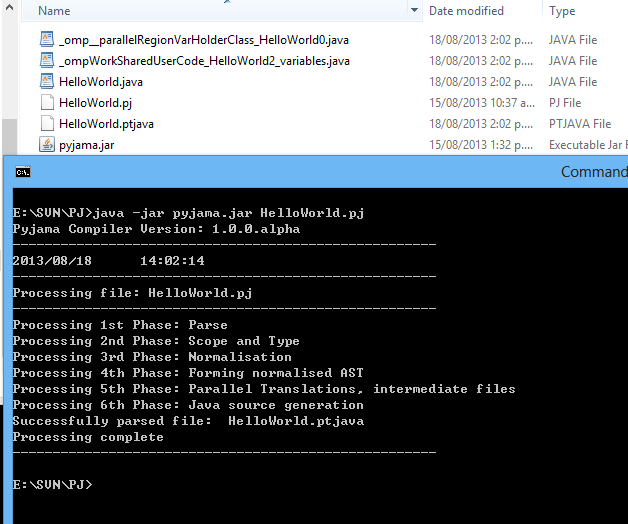
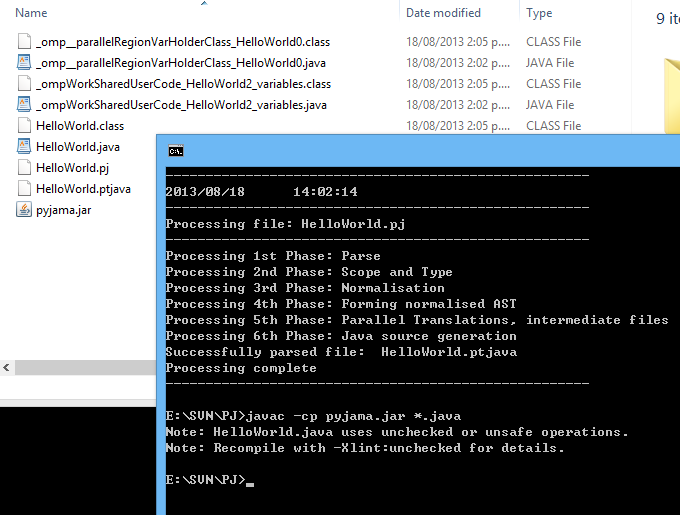
After the pyjama.jar file is prepared, you can start using it to compile your pj files by calling:
2.2.1 Using the Java OpenMP compiler
You should write your Java code inside a file with extension *.pj, and eventually the corresponding *.java file will be produced (which you can compile using the standard Java compiler). Therefore, when you try and run your code, make sure you are executing the *.java file as opposed to the *.pj file you are editing. You should never modify the produced *.java files, since your changes will be lost when you compile the original *.pj files using the OpenMP compiler:
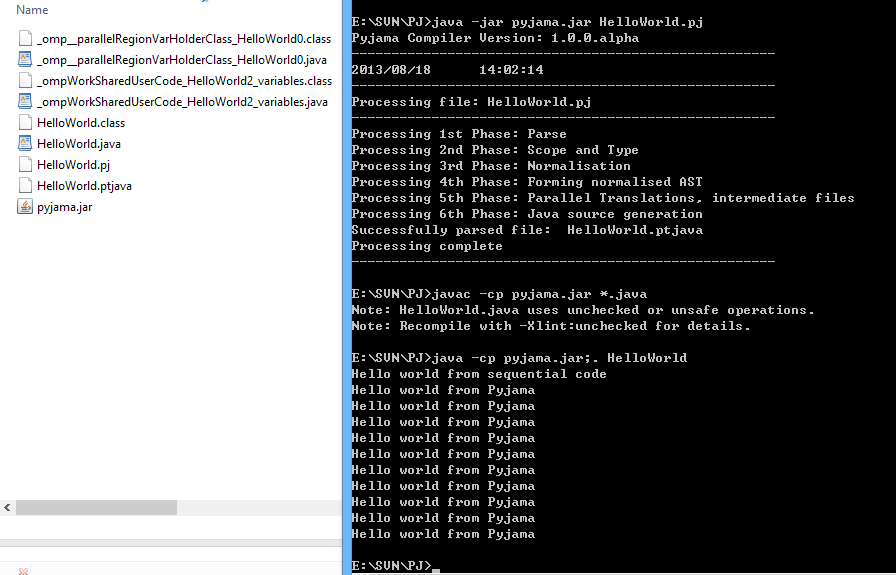
> java -jar pyjama.jar:. package/MyClass.pj
The above will produce a MyClass.java file in the same directory. You then compile this file using the standard Java compiler:
> javac -cp pyjama.jar:. package/MyClass.java
And run it:
> java -cp pyjama.jar:. package.MyClass
2.2.2 Classpath
You should include the pyjama.jar file in your classpath. The main class that you might interact with inside your code is java_omp.Pyjama (e.g. to get thread IDs, etc).
2.2.3 Refreshing
Sometimes you might get errors when you introduce new clauses or directives. What happens, is the OpenMP compiler introduces new classes sometimes. Therefore, your classpath might need to be updated to include those directories. The simplest approach, if you are using an IDE such as Eclipse, is that your can refresh the source folder view so that Eclipse sees those new classes. That way, your generated *.java files will be able to compile too. Also, whenever you modify the *.pj file, you of course need to run Generate again, and refresh the *.java file so that Eclipse sees the update.
2.2.4 Known problems and limitations
The current implementation of the Java OpenMP compiler only contains support for some of the most common and important features of OpenMP. The following directives are believed to be fairly stable. With the current implementation, the ordering of some of the optional clauses matters (but in a full implementation, the ordering should not matter). The ordering expected is specified.. anything in square brackets is optional:
-
//#omp atomic
-
//#omp parallel [“async”] [“if” “(“ expression “)”] [dataClauseList]
-
//#omp for [dataClauseList] [schedule] [“ordered”] [“nowait”]
-
//#omp parallel for [“async”] [“if” “(“ expression “)”][dataClauseList] [schedule] [“ordered”] [“nowait”]
-
//#omp ordered
-
//#omp section
-
//#omp sections [dataClauseList] [“nowait”]
-
//#omp parallel sections [“async”] [“if” “(“ expression “)”] [dataClauseList] [“nowait”]
-
//#omp single [dataClauseList]
-
//#omp master
-
//#omp critical [identifierName]
-
//#omp barrier
-
//#omp flush [“(“ argumentList “)”]
Some of the above non-terminals are expanded below:
-
dataClauseList -> ( dataClause ) +
-
dataClause -> “private” “(“ argumentList “)”
| “firstprivate” “(“ argumentCopyList “)”
| “lastprivate” “(“ argumentList “)”
| “shared” “(“ argumentList “)”
| “reduction” “(“ reductionOperator, argumentCopyList “)”
-
schedule -> “schedule” “(“ kind [“,” chunk] “)”
-
kind -> “static” | “dynamic” | “guided”
-
chunk -> integer constant or integer variable
-
argumentList -> variableName (“,” variableName)*
-
argumentCopyList -> copyArgPair (“,” copyArgPair)*
-
copyArgPair -> [ copyVariable “#” ] variableName
-
copyVariable -> an instance of java_omp.Copy<T>
-
reductionOperator -> “+” | “*” | userDefinedReduction
-
userDefinedReduction -> an instance of paratask.runtime.Reduction<T>
The follow are not supported or implemented yet:
-
//#omp threadprivate
-
Nesting of parallel clauses, etc. Although the compiler might accept some nesting, the runtime will ignore much of the nesting (e.g. nesting a paralel region within another parallel region will not cause a new team of threads to be created).
-
You currently cannot specify the size of the team of threads for different areas. Unfortuntely, the current implementation will always create a team of threads equal to the number of detected processors.
In regards to unstable features, the biggest known problem is using data clauses with the above directives (e.g. parallel, for, etc). In most cases, if you use simple data clauses (e.g. declare a variable as shared amongst a team), then things will compile. However, if you try more complex things, like declaring it as shared in an outer clause, and then try to redefine it to private within a nested clause, then things will get ugly. So, you might have to rewrite your code to keep things as simple as possible and ideally minimise the use of data clauses.
It would be great if you could send code that fails to do as you expect, please see contacts below. If you receive any unimplemented feature exceptions, or any exceptions that you feel should be working but are not, it would be great to hear from you so that they can be corrected. Thanks.
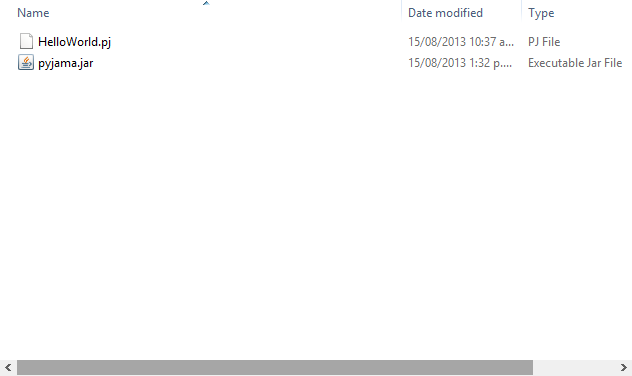
Before *.pj to *.java source to source compiling
After *.pj to *.java source to source compiling
After *.java compiling
Running
2.3 Pyjama Eclipse Plugin installation and usage
An Eclipse Plugin is also available for Pyjama developer. Downlaod
here
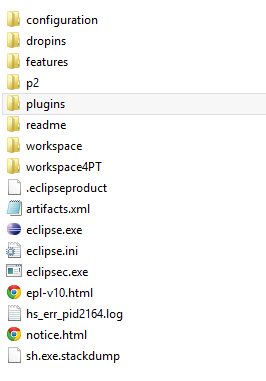
After you download it, put it into the eclipse plugin folder, then start the Eclipse
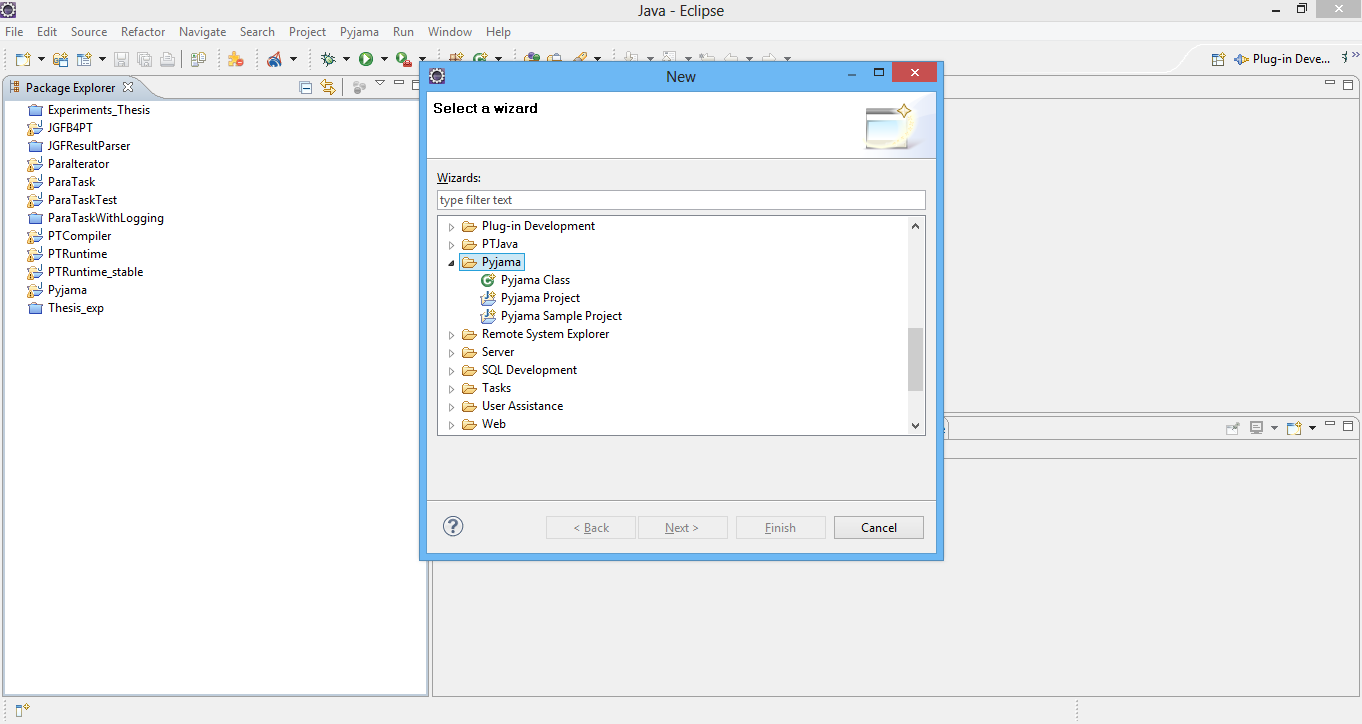
Now you can create a new Pyjama project by choosing "File" --> "New" --> "Other...", you will see the Pyjama project wizard.
Pyjama support android environment and is capable of generating code specific to either Desktop or Android platform. The plugin understands the project type created or selected and will generate the specific code.
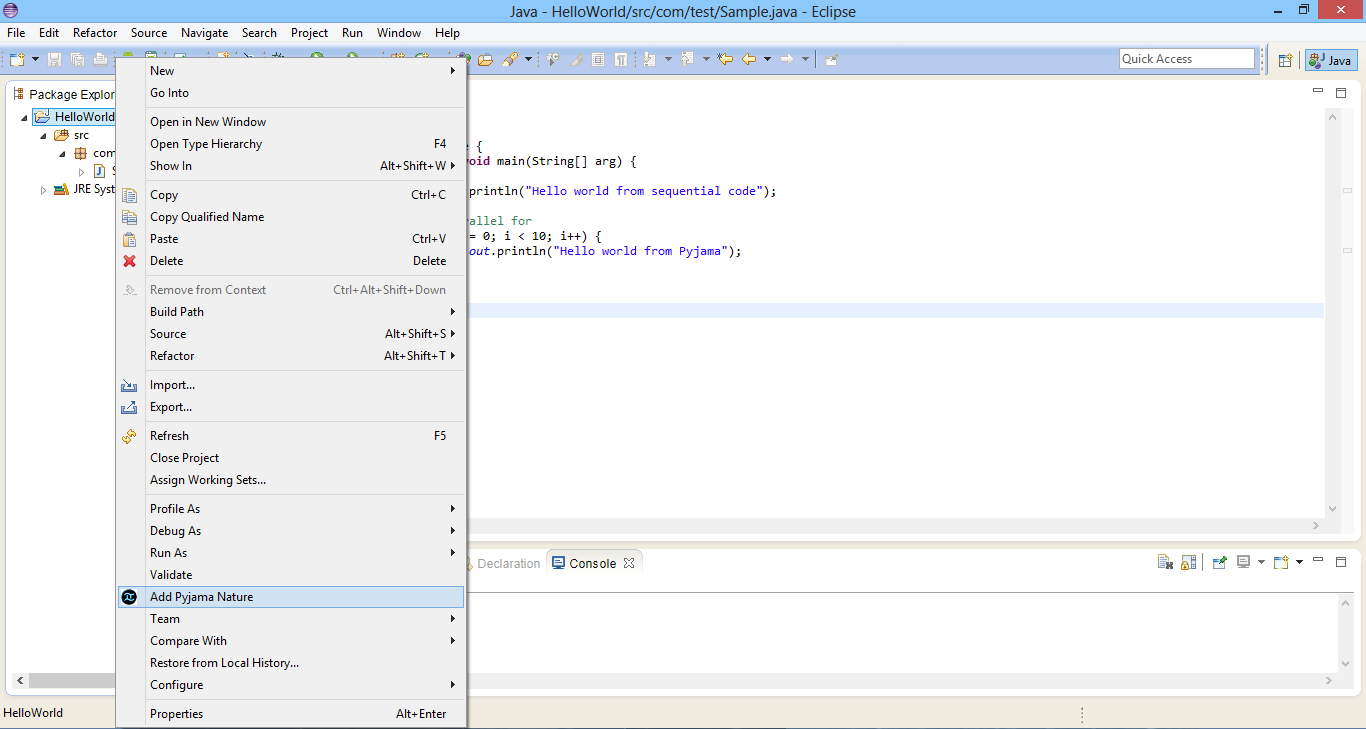
Alternatively, a developer can easily convert existing Java/Android project to Pyjama project with the click of a button in 2 steps on the required project,
Step 1: Adding Pyjama nature to Java/Android Project
Step 2: Convert Java file to Pyjama file
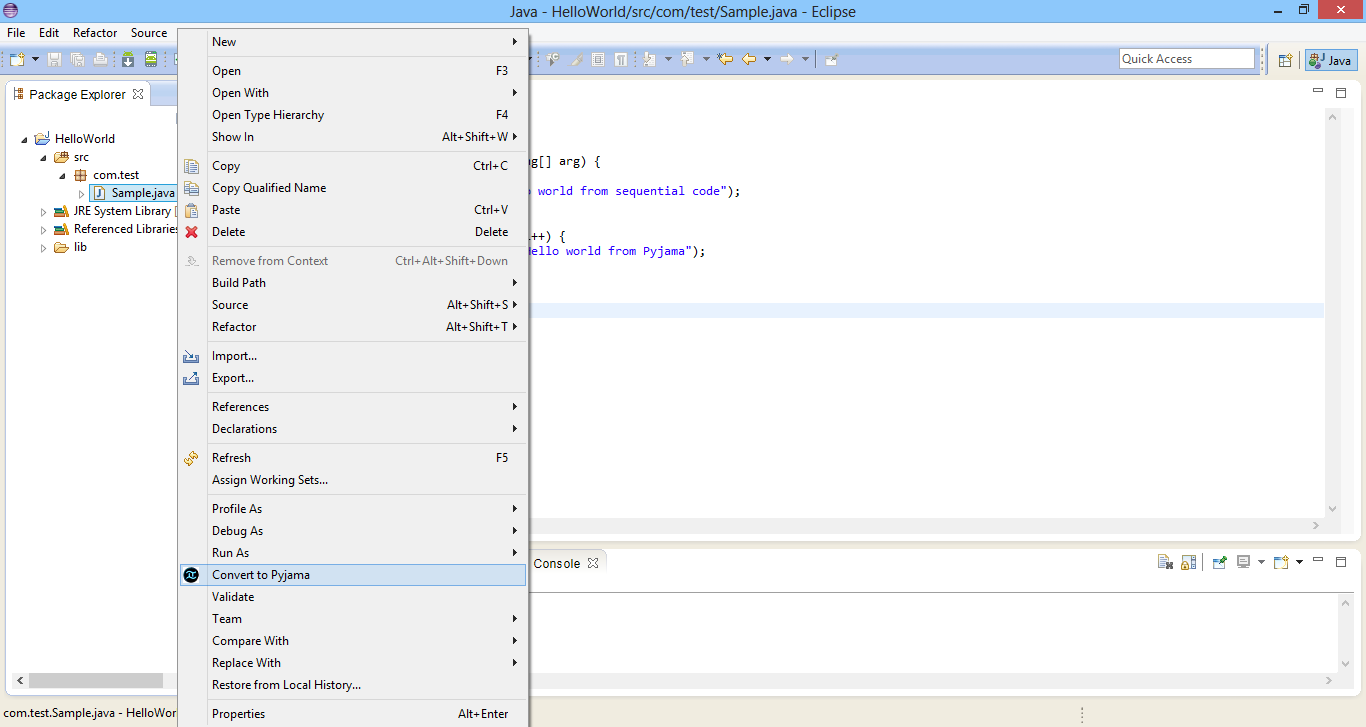
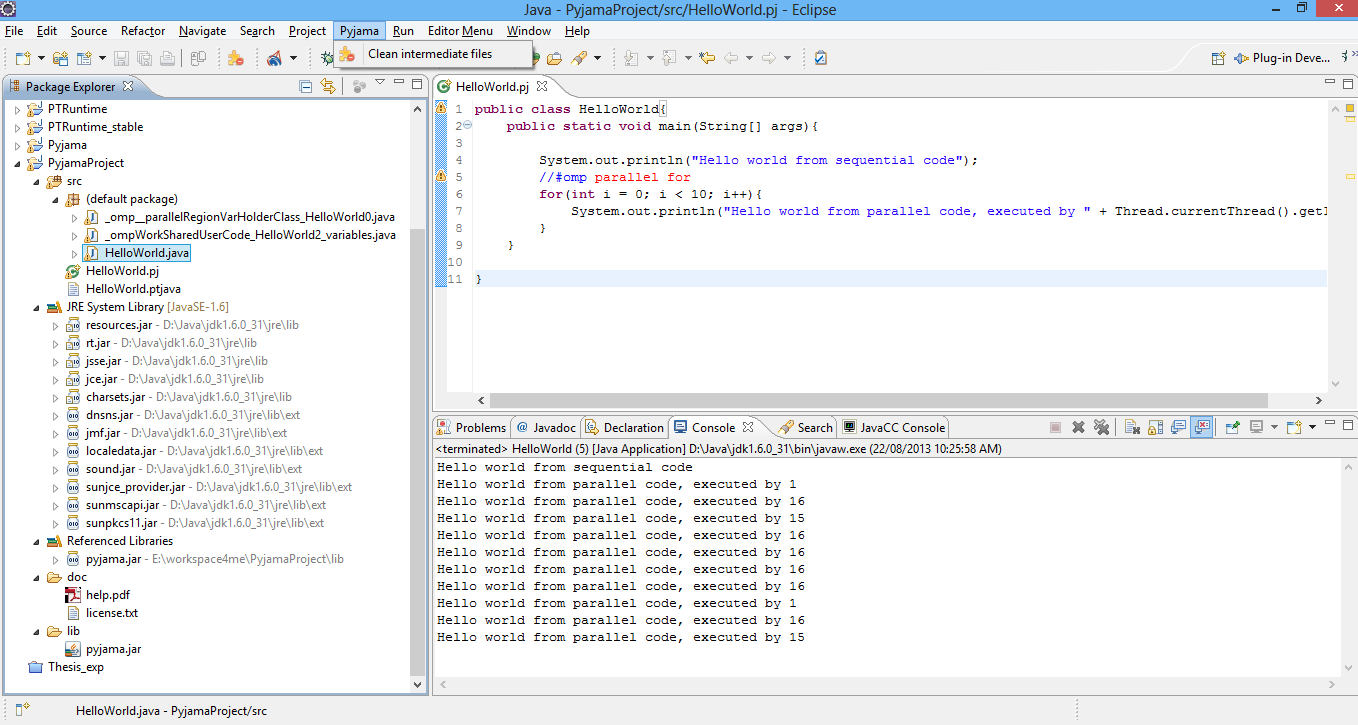
The plugin will help you to automatically translate the .pj file to .java, and compile it. You can also clean the intermediate files if you want.
